With the hot summer weather, I'm often seeing my beautiful bananas turn from green to brown in a matter of (what seems like) hours. I hate to throw them away, so this week I thought of some new--and vegan--dessert recipes that all use overripe bananas. If you have this delightful banana problem, then keep reading!
Wednesday, July 28, 2010
Sunday, July 18, 2010
Two great weeknight meals
I mentioned Robin Robertson's newest cookbook, Vegan on the Cheap, a couple entries ago when I made her recipe for barbecued tofu and black bean burritos. This week, I made two more of her recipes that proved to be equally delicious: an adapted version of her Penne-Wise Peanutty Pasta and her Tuscan White Bean Pizza. Here are my versions of the recipes:
When I made Robertson's Penne-Wise Peanutty Pasta, I had originally intended to make pad thai. Frustrated that my pad thai, although a favorite recipe among my friends, is usually too salty for my taste, I decided to give Robertson's Peanut Sauce a try. I was wary of using non-dairy milk in the sauce, but it turned out to be a fantstic addition, producing a creamier sauce that alleviates the need for so much soy sauce, peanut butter, and sugar (all the ingredients that make pad thai such a diet killer). Instead of using penne pasta, as Robertson recommends, I used rice noodles for a more authentic Pad Thai. I really love broccoli slaw and onions in my pad thai as well, so I used those vegetables instead of Robertson's recommended carrots, broccoli, and cilantro. Also, I didn't have silken tofu around my fridge, so I substituted cornstarch instead to thicken the sauce and also made a few other modifications. If you prefer, you could substitute tempeh or seitan for the tofu or other vegetables of your choice for the broccoli slaw and onion. Here's how the recipe ended up looking:
Enlightened Pad Thai
Serves 2
Peanut Sauce:
1 clove garlic, minced
1/2 teaspoon ground ginger
1 tablespoon cornstarch
1/4 cup peanut butter
2 tablespoon soy sauce
1 tablespoon apple cider vinegar
1 teaspoon sesame oil
1 teaspoon ketchup
1 teaspoon raw sugar
crushed red pepper flakes, to taste
1/2 cup unsweetened almond milk
Stir Fry:
1 Tbsp. olive oil
8 oz. tofu, drained, cut into desired slices, and pressed
1 clove garlic, minced
1/2 small yellow onion, chopped
3 oz. broccoli slaw
6 oz. rice noodles (approx. half of a package), cooked according to package instructions
Tuscan White Bean Pizza
From Robin Robertson's Vegan on the Cheap
Serves 2
Pizza Dough:
1 1/2 cups bread flour
1 teaspoon salt
1 package (2 1/4 teaspoons) active dry yeast
1/2 cup warm water (105-115 degrees)
Topping:
1 Tbsp. olive oil
2 cloves garlic, minced
3/4 cup (1/2 of a 15.5-oz can) Great Northern beans, drained and rinsed
Salt and pepper, to taste
3 Tbsp. water, or as needed
1 tomato, thinly sliced
1 Tbsp. fresh basil, chopped
When I made Robertson's Penne-Wise Peanutty Pasta, I had originally intended to make pad thai. Frustrated that my pad thai, although a favorite recipe among my friends, is usually too salty for my taste, I decided to give Robertson's Peanut Sauce a try. I was wary of using non-dairy milk in the sauce, but it turned out to be a fantstic addition, producing a creamier sauce that alleviates the need for so much soy sauce, peanut butter, and sugar (all the ingredients that make pad thai such a diet killer). Instead of using penne pasta, as Robertson recommends, I used rice noodles for a more authentic Pad Thai. I really love broccoli slaw and onions in my pad thai as well, so I used those vegetables instead of Robertson's recommended carrots, broccoli, and cilantro. Also, I didn't have silken tofu around my fridge, so I substituted cornstarch instead to thicken the sauce and also made a few other modifications. If you prefer, you could substitute tempeh or seitan for the tofu or other vegetables of your choice for the broccoli slaw and onion. Here's how the recipe ended up looking:
Enlightened Pad Thai
Serves 2
Peanut Sauce:
1 clove garlic, minced
1/2 teaspoon ground ginger
1 tablespoon cornstarch
1/4 cup peanut butter
2 tablespoon soy sauce
1 tablespoon apple cider vinegar
1 teaspoon sesame oil
1 teaspoon ketchup
1 teaspoon raw sugar
crushed red pepper flakes, to taste
1/2 cup unsweetened almond milk
Stir Fry:
1 Tbsp. olive oil
8 oz. tofu, drained, cut into desired slices, and pressed
1 clove garlic, minced
1/2 small yellow onion, chopped
3 oz. broccoli slaw
6 oz. rice noodles (approx. half of a package), cooked according to package instructions
- To make the sauce, combine all the ingredients in a blender or food processor and process until smooth. Set aside.
- In a large skillet, heat half of the olive oil over medium heat. Add the tofu and pan fry for approximately 5 minutes on each side side, or until crispy. Remove from pan and set aside.
- Heat the remaining oil in the skillet and add the garlic, onion, and broccoli slaw and saute until tender.
- Add the tofu and the sauce to the skillet and stir gently to combine. Serve over rice noodles. Enjoy!
Tuscan White Bean Pizza
From Robin Robertson's Vegan on the Cheap
Serves 2
Pizza Dough:
1 1/2 cups bread flour
1 teaspoon salt
1 package (2 1/4 teaspoons) active dry yeast
1/2 cup warm water (105-115 degrees)
Topping:
1 Tbsp. olive oil
2 cloves garlic, minced
3/4 cup (1/2 of a 15.5-oz can) Great Northern beans, drained and rinsed
Salt and pepper, to taste
3 Tbsp. water, or as needed
1 tomato, thinly sliced
1 Tbsp. fresh basil, chopped
- To make the dough, in a small bowl, mix together the yeast and the water. Let stand for 10 minutes. In a large bow, combine the flour and the salt. When the yeast mixture is ready, add the mixture into the flour mixture and mix well until combined. Knead the dough on a lightly floured surface for about ten minutes, or until smooth. Place the dough in a large airtight container and let rise for approximately one hour, or until doubled in volume.
- After one hour, punch the dough down and work it into a pizza crust. Place the dough on a lightly greased baking sheet. Cover with a clean towel and let rise for an additional twenty minutes.
- Preheat the oven to 425 degrees. To make the topping, mash the beans with the olive oil and garlic in a medium bowl. Season withs alt and pepper, to taste, and add water, if necessary, to form a paste. When the pizza dough is ready (after the final twenty-minute rise period), spread the bean mixture over the dough. Arrange the tomato slices and basil on top of the bean mixture.
- Bake the pizza for approximately 12-15 minutes, or until the crust is golden brown. Enjoy!
Saturday, July 10, 2010
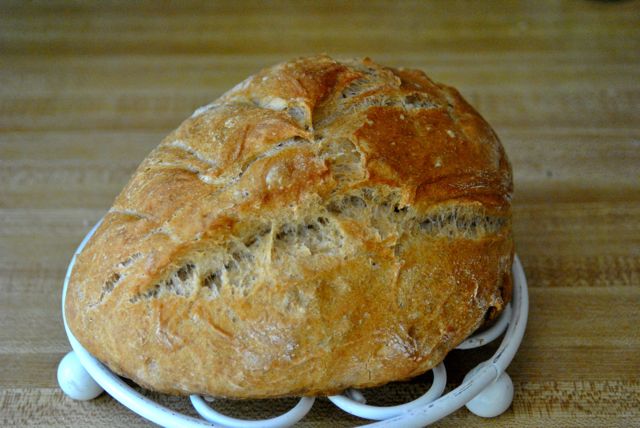
The Perfect Sandwich Rye Bread

The bread contains flaxseeds and sesame seeds, which Leader recommended soaking overnight. This would probably be a good idea as the soaked seeds contribute to the moisture of the dough; however, I forgot to do this and the bread turn out just fine with the seeds mixed right into the dough. This bread also bakes at a lower temperature (400 degrees) than most of Bread Nut's other breads, giving it a softer crust than traditional rye bread.
Flax and Sesame Seed Rye Bread
1/4 cup sourdough starter
3/4 cup water
1/4 cup flaxseeds
1/4 cup seseame seeds
2 teaspoons active dry yeas
1 cup bread flour
2/3 cup rye flour
3/4 teaspoon salt
- In a medium bowl, mix together the sourdough starter and water. Set aside.
- In a large bowl, mix the dry ingredients together. Stir in the sourdough starter mixture and mix until the ingredients bind together and are ready to knead.
- Knead the dough for ten minutes on a lightly floured surface, flouring your hands as necessary. Try not to add too much flour to the dough as you are kneading. Let the dough rest, uncovered, for ten minutes. Transfer to a lightly oiled bowl, cover with plastic wrap and allow to rise for about two hours, or until doubled in bulk.
- After two hours, uncover the dough and shape it into a loaf. Place in a lightly oiled bowl and let rise again for about one hour.
- One half hour before baking, place the Dutch ovens in the oven and preheat at 400 degrees.
- Uncover the Dutch oven and place the dough inside. Score the dough and sprinkle with sesame seeds. Replace the lid and bake for 40 minutes. After 40 minutes, remove the lid and bake for another five minutes or until the internal temperature of the bread reaches 200 degrees. Remove from the oven and cool completely before slicing. Enjoy!
Monday, July 5, 2010
Tomato Basil Focaccia, Garlic Herb Sourdough, and Sesame Braided Challah--all in one holiday weekend

Focaccia is a fantastic bread for those just starting to make their own breads--or in my case--those who want to make bread quickly, without the daylong proofing times characteristic of sourdough breads. If you make the focaccia thick enough to slice widthwise, it's a bread for grilled vegetable sandwiches, which is how my focaccia bread was happily consumed on Saturday. I chose fresh tomatoes and fresh basil (from my garden) along with some minced garlic for my toppings. Here's the recipe:
Tomato Basil Focaccia
Adapted from Local Breads by Daniel Leader
Makes 6 individual focaccia loaves
Dough:
1 1/4 cups warm water (105-115 degrees)
2 tsp. active dry yeast
1/3 cup extra virgin olive oil
3 1/4 cups bread flour
1 1/2 tsp. sea salt
Toppings
1 medium roma tomato, thinly sliced
1/4 cup fresh basil, chopped
1 large clove garlic, minced
1/2 cup olive oil
- In a small bowl, mix the yeast and the water until the yeast dissolves. Let sit for ten minutes. After ten minutes, add the olive oil to the yeast mixture.
- In a large bowl, mix the flour and salt. Add the yeast-oil mixture to the dry ingredients and stir until blended into a dough.
- On a lightly floured surface, knead the dough for about 12 minutes, or until smooth and elastic. Transfer the dough to a lightly greased bowl, cover with plastic wrap, and let rise at room temperature for 1 to 1 1/2 hours, or until the dough doubles in volume.
- Uncover the dough and divide it into six equal parts. Use your fingertips to shape each piece into a round, flat loaf and arrange loaves on two greased baking sheets. Brush the loaves with olive oil and lightly press the toppings over the top of the dough. Cover the baking sheets with palstic wrap or a toil and let rise again for 30 minutes.
- Preheat the oven to 375 degrees. Position one oven rack in the upper third of the oven and one in the middle. Bake the focaccias until golden brown, about 15-20 minutes. Switch the baking after 10 minutes of baking so the breads bake evenly. Enjoy!


Friday, June 18, 2010
BreadNutBakery.com
Hello crEATe friends! About a month ago, I announced that crEATe would be undergoing some big changes, and they're finally here. After much thought about the direction crEATe would take, I've decided to take the blogging into the real world and start a business focusing on bread, an ongoing crEATe theme. A few changes to note:
Determining the answers to the second question was fun. I set off to do some research--both on the web and in some classic cookbooks--on how to make my bread better. Some changes I've made are:
I'd love your comments on any part(s) of ths process as this is an entirely new exploration. Please comment below or email! Next week's post: finding a place to bake for the public. Any helpful suggestions are most appreciated!


- crEATe is now Bread Nut Bakery. This means that http://a2create.blogspot.com is now http://www.breadnutbakery.com. The old web address will redirect, but you'll now be able to find Bread Nut Bakery through an internet search.
- The main focus of BreadNutBakery.com will be bread baking and the process of starting a bread business. But don't worry: you'll still find easy vegan/vegetarian recipes and opinion pieces here, too.
- This is an experimental process: I'll be sharing recipes with you as well as the steps I'm taking to attempt to get this business up and running. This means that--more than ever--I'd love our comments, feedback, and suggestions!
- Is there a market in Greensboro for artisan breads?
- What breads do I make well enough to sell to the public?
Determining the answers to the second question was fun. I set off to do some research--both on the web and in some classic cookbooks--on how to make my bread better. Some changes I've made are:
- Shorter rising times in hot and humid weather (some of my rising times have been reduced from 18 hours to only 8)
- Slightly more flour (or less water)
- Less kneading (except for in the case of no-knead breads)
- Shorter baking times (particularly in the final, uncovered portion of Dutch oven baking)
I'd love your comments on any part(s) of ths process as this is an entirely new exploration. Please comment below or email! Next week's post: finding a place to bake for the public. Any helpful suggestions are most appreciated!


Friday, June 11, 2010
crEATe is back, now writing from Greensboro, NC!

 Hello, friends! My apologies for the lapse in writing. I wanted to let you know that I'm now writing from Greensboro, NC (no longer Ann Arbor). Having been here over a week at this point, Cody and I have been discovering all of the natural food joys Greensboro has to offer. One of the first new items we purchased after moving is a shiny red barbeque, which produced some fantastic grilled portabella mushrooms (recipe below). Now that we have a backyard, we've also planted several vegetables and herbs--tomatoes, onions, peppers, basil, rosemary, and dill--which will hopefully be the subject of recipes in posts later this summer.
As for the cooking saga, I'm finally back to work, making new vegan recipes, baking new breads, and continuing the soap-making experiment. Here's a few recipes to kick things off:
Grilled Portabella Mushroom Sandwiches
Grilled portabella mushrooms are a great entree to serve for friends who may not be vegetarian because they take on a meaty flavor when barbequed. Seasonings can be altered depending on your preferences.
6 medium-sized portabella mushrooms
1/2 cup extra virgin olive oil
2 cloves garlic, minced
1 tsp. sea salt
1 tsp. black pepper
1 tsp. chili powder
1/4 tsp. paprika
1/4 tsp. onion powder
1/4 tsp. coriander
12 slices fresh bread (I used my homemade sourdough)
Your choice of condiments: ketchup, mustard, relish, lettuce, sliced tomatoes, sliced onions, vegan cheese, etc.
- Wash portabella mushrooms and pat dry.
- In a small bowl, mix olive oil and seasonings. Using a pastry brush, rub seasoning mixture into the underside of the mushrooms and on top. Place mushrooms in an airtight container and refrigerate to marinate for four hours.
- Heat the grill. Place mushrooms directly on grill and cook until tender, approximately 10-15 minutes.
- Serve on fresh bread with desired condiments. Enjoy!
For the sourdough fans, here's a brand new recipe

Whole Grain Sourdough Bread
Using all of the whole grains I had in my pantry.
1 cup whole wheat flour
1 cup white flour
1 cup rye flour
1/2 cup buckwheat flour
1/4 cup quinoa
1/4 cup flaxseed
1/4 cup wheat germ
1 1/2 tsp. salt
1 1/2 cups distilled water
1/2 cup sourdough starter
1 Tbsp. agave syrup
- In a large bowl, mix dry ingredients. Set aside.
- In a medium bowl, mix the wet ingredients. Thoroughly the wet ingredients into the dry ingredients, kneading slightly and adding more water if the dough becomes too dry.
- Cover dough with plastic and allow to proof in a warm place for 18 hours.
- After 18 hours, place dough on on a floured surface, fold in thirds and then in half on itself. Place back in the bowl, cover with plastic, and refrigerate for 5-6 hours.
- After five hours, grease a Dutch oven or clay baker and place in the oven. Preheat at 500 degrees for 30 minutes.
- Uncover Dutch oven, place bread inside, recover, and bake for 40 minutes at 500 degrees.
- After 40 minutes, reduce temperature to 450 degrees, remove lid from the Dutch oven, and bake uncovered for 10 more minutes.
- Remove bread from Dutch oven and let cool. Enjoy!
Saturday, May 15, 2010
crEATe is changing!

I wanted to take this opportunity to thank you for supporting me through my blogging adventures so far, continuously inspiring and challenging me with topic suggestions, questions, compliments, and criticisms. What began as more or less of an exploration into a healthier and more natural way of life has turned into a plethora of learning opportunities, recipe creation, and a deeper look into the way in which we live.
I’m very excited to announce that in two weeks (hopefully!) crEATe will be undergoing some changes, and I’d like to open things up for your comments and suggestions. I’m currently working on a Wordpress blog format that will make crEATe more user-friendly. crEATe will also have its own domain name so more readers can engage in discussions. It is my goal for crEATe to ultimately become a sustainable, eco-friendly business that offers its supporters products and/or services to help them engage in a healthy, natural lifestyle.
I would love and appreciate your input on as many of the following questions as you'd like:
What is crEATe offering you that you like?
What would make crEATe better?
What topics would you like to see discussed?
What products and/or services would you like to see crEATe offer?
How do you read crEATe (ex. AnnArbor.com, Blogger, a reader, etc.)?
Should crEATe be more engaged in social media? In what way(s)?
Would you like to see crEATe offer other multimedia forms on the website (video, podcast, etc.)?
Do you have a URL name suggestion for crEATe (for a “.com” website)?
What would make you more excited about crEATe?
Feel free to post your thoughts as comments, email me directly at emilyweingarten@gmail.com, or respond anonymously via Google Forms here. Thank you again for your support so far and looking forward to hearing from you!
Friday, May 7, 2010
Vegan Cinco de Mayo Celebration
 In honor of Cinco de Mayo, I made my favorite vegan enchilada recipe this week and, realizing that I hadn’t shared it with crEATe yet, decided to make it the subject of this week’s blog post in case readers feel so inspired to have a post-Cinco de Mayo celebration.
 If you’re vegan—or enjoy vegan cooking—and don’t own a copy of Robin Robertson’s Vegan Planet, this book should be your next cookbook purchase. Robertson offers a short guide to eating vegan, explains foods that may be unfamiliar to non-vegans (tofu, tempeh, seitan, nutritional yeast, etc.), suggests dairy and egg substitutions, and lays the foundation for a successful vegan kitchen. The cookbook’s 400 recipes are divided into nineteen sections that include appetizers, soups, salads, pastas, “food that sizzles,” “the global oven,” vegan pizza, desserts, breakfasts, and many others. Her recipes are generally simple, require ingredients that can be found in most grocery stores, and cost-effective.
I modified Robertson’s recipe for Black Bean and Sweet Potato Enchiladas, adding tempeh for extra protein. Soy cheese on top would also be delicious!
Friday, April 30, 2010
Vegan Recipes of the Week plus an exciting opportunity for Ann Arborites

Jan Kemp, MS, AASDN and Nutrition Specialist, has been teaching Food for Life classes for five years through the Cancer Project. The goal of the Cancer Project is to promote cancer prevention and survival through a better understanding of cancer causes, particularly the link between nutrition and cancer. The classes are designed by physicians, nutrition experts, and registered dietitians and are offered in many cities around the U.S. The Cancer Project promotes a low-fat, plant-based diet rich in fiber, phytochemicals, and antioxidants. Several crEATe articles have touched on the long-term health benefits of a plant-based diet, so I’ll leave you to explore crEATe, Jan’s website, or The Cancer Project’s awesome downloadable packets.

I’ve been making basic whole wheat sourdough bread for several weeks now, and, yearning for a new, possibly more fibrous bread, I decided to try Breadtopia’s Whole Grain Sourdough recipe, which takes three days to make. Although three days might be a deterrent for some people, it stirred some nerdish excitement in me to think about what bread might taste like after fermenting and proofing for three days instead of only one. Turns out, it tastes pretty great and I followed Breadtopia’s recipe with a few reflective notes/realizations:
- This bread, unlike the other sourdough recipes I have posted, is not “no knead.” The kneading day was a very busy day for me, and I forgot to knead it, instead mixing the ingredients thoroughly. Luckily for me, it seemed to have no effect on the bread.
- Next time, I’d probably use more water and cut the recipe in half as this bread turned out fairly dense.
Whole Grain Sourdough
Day 1 (evening)
Mix together:
7/8 cup water
½ cup sourdough starter
2 cups whole wheat flour.
Cover loosely with plastic and let sit out at room temperature for 12 hours.
Day 2
Add to Day 1 mixture:
1 ¼ cup water
7/8 cup rye flour
2 cups white bread flour
1 ¾ cups spelt flour
1 Tbsp. salt
Knead, return to bowl, and cover with plastic wrap. Refrigerate for 24 hours.

Form a loaf and let sit at room temperature, covered with plastic, for five hours.
Place Dutch oven inside oven and preheat oven to 485 degrees for 30 minutes.
Bake bread for 30 minutes covered and 15 minutes uncovered.
Eat!
This is the first crEATe recipe that calls for seitan, so I’ll provide a little background information about this fantastic “wheat meat.” In my early meat-free days, I avoided seitan, perhaps because it was hard to find in the grocery store or I didn’t know how to pronounce its name (it’s say-tan). Seitan is great because it’s one of the only meat alternatives not made from soy. Unfortunately for gluten-free folks, seitan is made primarily from the protein part of the wheat plant. Because of this, seitan is high in protein (approximately 20 grams per 3-oz., 110-calorie serving) and has a meaty, flavor-absorbing texture that is perfect for stir fries, stews, and even barbeque.
The recipe I made this week is adapted from Robin Robertson’s Vegan Planet. Robertson has recently released a new cookbook, Vegan on the Cheap.
Pan-Seared Seitan with Red Wine Reduction
1 Tbsp. olive oil
1 package seitan (I use Trader Joe’s brand)
2 cloves garlic, minced
1 medium onion, minced
2 stalks broccoli, chopped
2 carrots, peeled and sliced
½ cup dry red wine
1 cup vegetable broth
1 tsp. thyme
salt and pepper, to taste
1. Heat the olive oil in a large skillet on medium-high heat. Add the seitan and cook until heated, about 5 minutes.
2. Add garlic, onions, broccoli, and carrots and cook until tender.
3. Add red wine, vegetable broth, and thyme and cook until about half the liquid is reduced.
4. Serve over noodles, rice, or your favorite grain. Enjoy!
Saturday, April 24, 2010
Should the FDA regulate our sodium intake?
 I’ve been seeing a lot of stories in the news lately about the report the Institute of Medicine released last Wednesday officially stating that Americans eat too much salt and urging the FDA to regulate sodium content in foods. All the organizations seem to agree that Americans consume too much salt:
 - The report from the IOM shows an upward trend in sodium intake since the 1970s,
- An FDA press release began this week stating that Americans consume several times as much sodium as their bodies need,
- And the Center for Disease Control and Prevention (CDC) states that the average American consumes twice as much sodium as their daily recommendation, 2300 milligrams of sodium.
Reducing sodium intake is somewhat complicated for three reasons: (1) Salt has been used since ancient times as a preservative, flavor enhancer, and recipe thickener (2) our bodies have evolved to crave salt because of the health risks of not having enough and (3) the American diet is absolutely loaded with salt.
Considering the first reason, the CDC statistic that 77% of the average Americans’ daily sodium intake comes from processed foods should come as no surprise. We like salt in our canned foods (think soup) and processed meats (think corned beef) for both shelf life and flavor. The other remaining 23% of our daily salt intake comes from food that naturally contain sodium (12%), adding salt at the table (6%), and salting foods during cooking (5%). Salt is necessary, for example, to give texture, flavor, and structure to some of the most traditionally healthy foods such as breads, beans, and soups.
The third reason is obviously perpetuated by the first and second reasons. A Premium Crispy Chick Club Sandwich with French Fries at McDonalds provides 1800 milligrams of sodium. Salt is also hidden in many low-fat foods, as sodium has made up for flavor lost in our focus on low-fat foods. One cup of low fat cottage cheese can contain 900 milligrams of sodium and low-fat dressing can contain up to 700 milligrams.
It seems somewhat reasonable for the FDA to regulate sodium intake, but, as a proponent of natural foods, I think there is much reason to worry. Although the IOM is advocating for better ways to track our sodium intake (this makes me think of better consumer education) and urging food companies to collectively reduce sodium content in food, it is also urging development of “innovative methods to reduce sodium in food while maintaining palatability, physical properties, and safety.” We don’t yet have a substitute for salt, but we have reason to believe that a salt substitution might not be safe. After all, substituting high-fructose corn syrup for sugar isn’t the healthiest choice, but it’s still considered “safe” by FDA standards. It isn’t completely unlikely either that food companies might increase sugar content to make up for reduced sodium content.
Perhaps the best way for us to use the IOM’s newly released report on sodium is to start becoming more aware of the amount of sodium for that matter we eat on a daily basis. As with most government-run programs, individual reform would be much quicker and probably healthier. Here are some easy ways to reduce your salt intake:
- Eat more fresh fruits and vegetables
- Flavor foods with other herbs instead of salt. Summer is a great time to start growing your own herbs as well!
- Don’t snack on salty foods. If you snack, try swapping your salty snack foods for whole foods such as fruits and vegetables or even unsalted popcorn. You might be surprised as to how well you adjust.
- Read food labels, paying close attention to the “percent daily value” of sodium listed on the nutrition facts panel. Any food with over 20% of your daily value for sodium is considered high by FDA standards.
- Eat less processed and restaurant foods. If this is where 77% of our sodium intake comes from, it only makes sense to eat less of it. Odds are, if you make a soup yourself instead of out of a can, you’re going to add less salt than Campbell’s or Progresso would. Try making your own macaroni and cheese with real cheese, milk, and a little butter, your own spaghetti sauce with real tomatoes and fresh herbs, or your own cake from scratch. If you have the time, passing up the packaged foods for real recipes is much more rewarding, both in terms of taste and the emotional/spiritual value of your meal.
Split Pea Soup
Adapted from The Moosewood Cookbook
Although this soup still uses salt as a seasoning, cider vinegar, black pepper, and sesame oil pack add new flavor to an old recipe. Serves 6.
3 cups dry split peas
8 cups water
2 bay leaves
2 medium onions, minced
4 cloves garlic, minced
2 carrots, sliced
1 sweet potato, peeled and diced
¼ cup apple cider vinegar
Salt and pepper, to taste
Sesame oil (for garnish)
- Place split peas, water, and bay leaves in a large pot. Bring to a boil, lower heat, and simmer partially covered for 20 minutes.
- Add onion, garlic, carrots, and sweet potato. Simmer partially covered for about 40 more minutes, stirring occasionally and adding more water, if necessary.
- Add vinegar and salt and pepper. Serve topped with sesame oil. Enjoy!
There’s nothing like fresh tomato sauce, especially in the summer when fresh tomatoes and herbs are readily available. The sauce can be made as plain or complex as your heart desires. Serves 6.
6 medium tomatoes, chopped
2 onions chopped
2 Tbsp. olive oil
Fresh herbs, to taste
White wine, optional
Salt and pepper, to taste
Heat tomatoes, onions, and olive oil in a large saucepan. Add fresh herbs and white wine to taste and simmer for 30 minutes. Add salt and pepper to taste. Serve over pasta, couscous or quinoa. Enjoy!
Saturday, April 17, 2010
Fun with Flaxseeds

The health benefits of flaxseed are astounding. The Bob’s Red Mill package summarizes these benefits the most concisely using the letters of the actual word “flax:”
F- Fiber: 2 tablespoons contains 4 grams of fiber (equivalent to a serving of oatmeal or a cup of blueberries). Fiber helps keep harmful LDL cholesterol levels low and maintain the good HDL cholesterol levels.
L- Lignans: A natural antioxidant that prevents unchecked cellular growth and promotes a healthy hormonal balance. Flaxseed has at least 75 times more lignans than other plant foods: 2 tablespoons of flaxseed has the same amount of lignans as 30 cups of broccoli.
A- Alpha-linolenic acid: an important omega-3 acid that is difficult to find in other plants. For more information about omega-3 acids, see creATE's Understanding Fats.
X- Excellent choice!
The nutritional benefits of flaxseed have led to studies supporting flaxseed’s role in protecting against breast cancer, prostate cancer, colon cancer, heart disease, and diabetes. Other findings show that the phytoestrogen contained in the lignans of the flaxseed may alleviate menopausal symptoms. Still more findings indicate that the omega-3 acids in flaxseed can reduce inflammation in arthritis sufferers and even improve symptoms of depression by promoting healthy brain function.
When buying flaxseeds, it’s important to note that your body cannot absorb the nutritional benefits of flaxseeds by eating them whole. So if you’re not going to grind the flaxseeds yourself (you can do this in a coffee grinder or food processor), definitely opt for the ground variety. Milled or ground flaxseed are both the same as flaxseed meal, so don’t be confused by the product label. Although whole flaxseeds can be stored at room temperature, ground flaxseeds will oxidize and lose their nutritional benefits. For this reason, it’s important to store ground flaxseeds in the refrigerator or freezer in a dark, airtight container or bag.
For vegans, flaxseed makes a great egg substitute. To make one fake “egg,” whisk together 1 tablespoon flaxseed and 3 tablespoons water in a bowl and let stand for two minutes.
If you’re trying to work more flaxseed into your diet, start by adding flaxseed to your usual breakfast foods. Flaxseed’s nutty flavor readily enhances oatmeal, cold cereal, and yogurt. Simply add a couple of spoonfuls of flaxseed just before eating. You can also add a few tablespoons of flaxseed to breads, cookies, muffins, pancakes, and waffles. In this case, flaxseed will substitute for some of the flour. I love to add flaxseed—and cinnamon—to peanut butter for enhanced flavor, texture, and extra nutrients.
Here are a couple recipes to get you started your flaxseed adventures. Remember, the easiest way to incorporate flaxseeds into your diet, is to start adding small quantities to foods you like to eat. It may take some time to get used to the taste, but you’ll soon love the new taste and texture!
Banana-Flax Pancakes
These pancakes are a delicious treat that provides a good source of whole grains, cinnamon, and flaxseed.
1 ½ cups flour (you can use part whole wheat or oat flour)
2 Tbsp. ground flaxseed
2 tsp. baking powder
½ tsp. ground cinnamon
2 Tbsp. agave sweetener
1 ¼ cup nondairy milk
2 very ripe bananas, mashed
- In a large bowl, combine the flour, flaxseed, baking powder, and cinnamon. Set aside.
- In a medium bowl, blend together the agave sweetener, nondairy milk, and mashed bananas. Mix the wet ingredients into the dry ingredients until just combined.
- Heat a lightly oiled skillet over medium heat. Ladle ¼ cup batter on to the pan. Cook until small bubbles appear on the top of the pancakes. Flip with a spatula and cook on the other side until lightly browned. Enjoy!
2 cups all-purpose flour (you can use part whole wheat white or oat flour)
2 teaspoons baking powder
¼ cup flaxseed
3 medium-sized, very ripe bananas, peeled and mashed
½ cup nondairy milk
¼ cup vegetable oil
¼ cup agave sweetener
oats and/or turbinado sugar, optional
- Preheat the oven to 375 degrees. Oil a 9x5 loaf pan with nonstick cooking spray.
- In a large bowl, mix together the flour, baking powder, and flaxseed.
- In a medium bowl, blend the bananas, nondairy milk, oil, and sweetener. Mix the wet ingredients into the dry ingredients until blended.
- Pour mixture into prepared pan. Sprinkle oats and/or turbinado sugar on top, if using. Bake for 60 minutes or until a toothpick inserted into the center comes out clean. Allow to bread cool in pan before serving. Enjoy!
Friday, April 9, 2010
Dutch Oven Sourdough Bread and Fudgy Vegan Brownies
 This week’s Adventures With Sourdough addition is particularly exciting, because I finally acquired a Dutch oven. Despite the jokes you have to put up with when you talk about Dutch oven cooking, I can now attest that Dutch ovens—or other clay bakers—are absolutely essential for crusty sourdough bread.
For baking, the Dutch oven creates the perfect closed vessel humidity for crispy, crusty sourdough bread. This week, I made the whole-wheat sourdough bread in first addition of Adventures With Sourdough. This time, however, instead of baking dense, doughy bread, I was able to get a loaf with a crusty crust and a light, fluffy inside. Following the instructions from Breadtopia, I preheated the Dutch oven at 500 degrees for 30 minutes. I then placed the bread in the Dutch oven and baked it at 500 degrees for 30 minutes. Finally, I removed the lid, lowered the oven temperature to 450 degrees, and baked the bread uncovered for 15 minutes. Here is a picture of the bread:

Another great discovery I made this week in the realm of vegan baking is the advantages of using soft tofu in dessert recipes. Here’s the vegan brownie recipe I adapted from Vegan Cookies Invade Your Cookie Jar.
Fudgy Vegan Brownies
3 oz. firm silken tofu
1/3 cup nondairy milk
1/3 cup nonhydrogenated vegetable oil
½ cup agave nectar
1 cup flour
½ cup unsweetened cocoa powder
1 tsp. baking powder
Preheat the oven to 325 degrees. Lightly coat an 8-inch baking pan with cooking spray.
Puree the tofu, nondairy milk, and oil in a blender or food processor until smooth. Transfer mixture to a bowl and mix in agave.
Gently stir in the flour, cocoa powder, and baking powder. Batter will be very thick.
Spread batter into baking pan and bake for 35 minutes. Cool for 15 minutes. Serve warm or at room temperature. Enjoy (possibly with some soy ice cream!)!

Friday, April 2, 2010
Make Your Own Shampoo!

If you’re not interested in reading further about the process of making your own hair care products, but still want to know a bit about chemicals to watch out for, I’ll provide a bit of information first. Two common and potentially harmful chemicals I’ve read about are laurel sulfates (particularly sodium laurel sulfate) and parabens. Laurel sulfates dissolve grease from your hair, but are also used to degrease car engines. Laurel sulfates are also responsible for making our shampoos sudsy. Parabens are chemical preservatives identified as methyl, propyl, butyl, or ethyl that can disruptively alter estrogenic hormones, interfering with the body’s endocrine system.
Although the amount of laurel sulfates and parabens we actually absorb from daily shampooing is arguable, it’s important to note a few things:
- Both laurel sulfates and parabens are absorbed through intact skin and have caused severe irritation—and damage—to the skin and eyes in higher concentrations.
- Higher concentrations of laurel sulfates and parabens alter the body’s estrogen hormones, which can stimulate breast and ovarian cancers in females and decrease male fertility rates.
- The laurel sulfates and parabens we wash down the drain in the shower are later absorbed by the fish we eat and the water we drink, raising an important environmental concern.
Besides potentially harmful chemicals, many cosmetics—or specific ingredients in shampoos—are tested on animals and/or contain animal byproducts. Although animal fats can make our hair smooth and shiny, slaughterhouses often sell their unusable animal products to cosmetic companies for use in our soaps. Glycerin is one common animal ingredient (although there is vegetable glycerin), but there are many others. The best way to be sure that your product is animal-free is to call the manufacturer if your product is not labeled accordingly.
If you’re not up for making your own shampoo, which can take a bit of work, and often doesn’t result in the color and consistency we’re used to, there are many companies that make products without laurel sulfates, parabens, or animal products. Some brands include Burts Bees, Kiss My Face, Jason, Nature’s Gate, and Avalon Organics, although there are many others. Trader Joe’s and Whole Foods also make body products without laurel sulfates, parabens, or animal products.
This week, I tried two types of shampoo recipes and one conditioner.
Rosemary Chamomile Shampoo
Adapted from Ecobites.com
Ingredients:
1 4oz. bar Castile soap (I like Kirk’s)
4 cups water
¼ cup strong chamomile tea
10 drops rosemary oil
Using a cheese grater, finely grate the soap. Place in a large saucepan with the water and bring to a boil, stirring constantly. Reduce heat to medium, and stir until soap dissolves completely. Add tea and rosemary oil and pour into a glass or heat-resistant plastic jar. Soap will be paste-like at room temperature. If it’s too thick for your taste, reheat, adding more water.
How it really worked: I liked this shampoo recipe because it degreases my hair, suds nicely, and the rosemary and chamomile combination balances soothing and refreshing. It leaves my hair with a slight residue, but the conditioner recipe cleans that out beautifully.
Olive Oil and Baking Soda Shampoo
Adapted from The Daily Green
2 Tbsp. olive oil
1 Tbsp. baking soda
2 Tbsp. water
Knead the olive oil into your scalp. Wait 30 minutes. Mix baking soda and water together in a cup to make a paste. Knead mixture through scalp and hair in the shower and rinse.
How it really worked: My hair is not naturally oily, but kneading olive oil through my scalp left my hair way too greasy and heavy feeling.
Cider Vinegar Conditioner
Adapted from Ecobites.com
1 part cider vinegar (I like Whole Foods brand)
3 parts water
rosemary oil
Mix ingredients together in a bottle. Pour over hair in the shower and rinse well.
How it really worked: This conditioner works fantastically well for removing residue and leaving my hair shiny. It also enhances my natural curls. Definitely a keeper!
If you’ve made your own shampoo and conditioner before or have more information about natural hair care products, I’d love to hear from you! I’m by no means and expert on the subject, but hope to try—and post—more shampoo and conditioner recipes in the next few weeks. Happy shampooing!
Friday, March 19, 2010
Vegan Recipes of the Week: Spelt Bread and Chocolate Peanut Butter Pillows

I’m going to take a lighter approach this week and offer you two new recipes, one a continuation of creATE’s Adventures With Sourdough, and the other the start of a new creATE theme, vegan cookies.
Last week, I switched gears in my sourdough bread activities to try spelt sourdough bread. Here’s a bit of history on spelt, before I explain the process of making the actual bread, which turned out to be quite involved. Spelt is one of the most ancient grains, first grown around 5000 B.C.E. in ancient Mesopotamia. In Europe, spelt is very popular and is known by many names, including “Farro” in Italy and “Dinkle” in Germany. Besides having funny names overseas and a great, nutty flavor in baked goods, spelt has a high fiber, protein, and B vitamin content than wheat. Its tough hull makes it difficult to process by modern methods, protecting the grain from pollutants and insects, and thereby decreasing the need for pesticides. Spelt has a lower gluten content than some processed wheat products, so those with gluten sensitivities may be able to eat spelt.
Making the spelt bread was more labor-intensive than the basic whole-wheat sourdough I wrote about in previous entries. The results, however, were well worth the effort. I’d recommend starting your spelt bread in the late afternoon or early evening.
In a large bowl, mix together 5 cups whole spelt flour and 1½ tsp. salt. In another bowl, mix together 1 ½ cup distilled water, 2 Tbsp. agave nectar or other natural sweetener, and ¼ cup sourdough starter. Add the wet ingredients to the dry ingredients and mix until a moist dough forms. Cover the bowl with a plastic bag and let sit for one hour in a warm place.
After one hour, uncover the dough, stretch it and fold in half. Repeat 3-4 times. Cover again, let the dough sit for thirty more minutes and repeat. Repeat this process two more times for a total of four “stretch-and-fold” periods.
Cover the dough with a plastic bag and let sit for twelve hours, or overnight.
The next morning, place the dough on a lightly floured board. Fold the sides of the dough upwards and pinch the sides together at the top. Place the dough top side down in a lightly floured bowl, cover, and let sit for 1½ hours.

After one hour, place a pan of water in the lower rack of the oven and preheat the oven to 450 degrees. This creates humidity in the oven that simulates the environment of a Dutch oven or clay baker. Flip the bread from the bowl on to an oiled baking pan. Bake for 45 minutes. Cool loaf on a wire rack and enjoy!
Having just purchased the book Vegan Cookies Invade Your Cookie Jar by Isa Chandra Moskowitz and Terry Hope Romero and finding that the recipes in the book have completely changed my vegan baked goods, I’m going to try to also publish one vegan cookie recipe each week. Here’s the recipe for the Peanut Butter Chocolate Pillows I baked last week:
Chocolate dough:
½ cup oil
½ cup brown sugar
¼ cup maple syrup or other natural sweetener
¼ cup nondairy milk
½ tsp vanilla extract
1½ cups flour
½ cup cocoa powder
½ tsp. baking soda
Peanut butter filling:
¾ cup peanut butter
¼ cup agave nectar
¼ cup nondairy milk
Preheat oven to 350 degrees. In a large bowl, combine the oil, sugar, maple syrup, nondairy milk, and vanilla and mix until smooth. Stir in flour, cocoa powder, and baking soda until mixture forms a moist dough.
To make the filling, mix together all ingredients in a medium bowl until uniform. Divide into 24 balls.

To assemble the cookies, scoop a tablespoon of dough and flatten with your hands to form a round disk. Place a peanut butter ball in the middle and wrap the dough around the filling to a “pillow.” Place the cookies on a lightly oiled baking sheet and bake for 10 minutes. Let cookies cool on the cookie sheet for a few minutes before moving to a wire rack to cool completely. Enjoy!
Saturday, March 13, 2010
Vegans, Not Freaks
I recently received a copy of Vegan Freak: Being Vegan in a Non-Vegan World by Bob Torres and Jenna Torres. I read the book in a couple of days, and I have to say, as much as I love fellow vegans, I am sincerely disappointed.
Vegan Freak is a sort of vegan manifesto in which the authors, a married couple and the executive editors of Tofu Hound Press, the company that published the book, attempt to instill vigor and commitment into already-vegans and inspire non-vegans to take on the lifestyle. There isn’t anything wrong with this. Sometimes the only way for vegans to get respect is to be able to eloquently state their reasons for being vegan and to be consistent in their diet and lifestyle. Inspiring others to be vegan is OK, so long as it doesn’t go to far.
I don’t want to write a blog entry criticizing Vegan Freak because the authors spend so much time criticizing anyone who is not vegan and using a variety of other negative tones such as cursing profusely and making bad sexual jokes. Instead, I’d like to argue for a different vegan manifesto, one that reflects the compassionate lifestyle and peaceful mindset that is inherent to veganism in the first place. Here are a few of my thoughts on veganism.
Any reasons for being vegan are great, so long as they are motivated by a desire to create some sort of positive change.
Although animal rights is one great reason for going vegan, there are many other reasons people decide to go vegan. As long as your reasons for going vegan are not completely vain or ill founded—i.e. you think it will make you look like an emaciated movie star, you think it’s the new fad, or you want to impress someone else—your reasoning is probably logical. Among these motivations might be for the ethical treatment of animals, to support a more sustainable environment, for your personal health, or to simply adopt a more compassionate outlook on life by changing your relationship to food and other consumables.
Environmental vegans are just as valuable as ethical vegans. We certainly need vegans to advocate for animal rights.
If you aren’t aware of how unethical and cruel our meat and dairy industries are, just watch or read Food, Inc, and you just might end up being vegan. But veganism is also about supporting a more sustainable environment. Not only does the meat and dairy industry abuse and kill animals, it also uses an unbelievable amount of energy in the process. Although the process of harvesting and transporting produce, grains, and other plants to grocery stores and farmer’s markets requires energy, the energy required is significantly less and can produce many more pounds of food per area of land than producing animal products. And because vegans are often among the groups of people interested in where their food comes from, they are more likely to support sustainable agricultural practices and support local and organic foods.
Veganism is about you.
I’ll risk using the cliché, “you are what you eat,” because I believe that veganism embodies this phrase perhaps more than any other diet. By choosing to be vegan, you are bringing a heightened awareness to the type of food you put in your body, where that food comes from, and how that food makes you feel when you eat it. Being vegan might also make you consider how the clothes you wear make you feel, and you might stop wearing leather, wool, and silk. It’s OK to be proud of yourself for making these personal choices, but acting with modesty and humility around non-vegans is always the best way to go.
The whole world isn’t going to stop eating meat.
As a vegan, I think it’s great that veganism is becoming more widely known. There are more online and print resources than ever for vegans, vegan conferences, vegan clothing brands, and vegan restaurants. That being said, vegans are a minority—not freaks—and cannot expect our entire society to adopt a vegan lifestyle when meat and dairy are central components of most Americans’ diets. While some are able to make the transition to vegan lifestyle “cold turkey,” most people in our country wouldn’t even begin to consider this process. What we can do is support the people who are interested in learning more about vegan lifestyle and possibly becoming vegan without alienating ourselves by projecting our vegan philosophies on others who may not be interested at all.
Veganism is sometimes about compromise.
It might make me a speciest to say this, but people are much more important to me than animals. So if on my birthday, someone makes or buys me a non-vegan cake, I’m going to have a slice to avoid offending that person or causing hurt feelings. There have been so many instances in my vegan experience thus far where someone has made a special effort—at a restaurant, family dinner, or gathering with friends—to make sure I was accommodated. As vegans, we need to reciprocate. There are more appropriate time to talk about our lifestyle choices.
Vegetarians are OK.
Yes, the dairy industry can be just as cruel and unethical as the meat industry, but vegetarians and vegans have many common values, and as vegans, we must respect that in order to be respected.
Finally, and most importantly, veganism is about respect, for animals, the earth, and other people.
We can’t expect to receive respect from non-vegans and grow any sort of vegan movement if we don’t treat others with respect. We need to recognize that animal products have deep roots in our society and we can’t expect everyone to agree with us. Even if you never compromise your vegan values, this still means not projecting your values on non-vegans, not making judgments about meat eaters, and treating everyone with the same respect you would always like to have as a vegan.
Vegan Freak lacks the compassion, humility, peacefulness that should come with a vegan lifestyle. To give credit to the book, the authors offer a lot of useful tips about vegan cooking, what types of restaurants are the most vegan-friendly, and traveling vegan. If you’re thinking about going vegan, the best thing you can do is talk to a vegan you know and check out the plethora of online and print resources available. If you’re vegan, don’t be a freak about it.
Saturday, March 6, 2010
Vegan Meat (Asian style)

Not all restaurants in the South are like this, but I definitely didn’t expect a vegetarian, vegan-friendly restaurant to pop up when I Google-searched “Greensboro vegetarian” the week before visiting the quaint, beautiful North Carolina city. To my surprise, Greensboro is home to Boba House, a restaurant and tearoom just off the UNC-Greensboro campus. Established in 2003, Boba House is the winner of the Vegetarian Restaurant of the Triad (the “Triad” includes Greensboro, Winston-Salem, and High Point) and both the Rhinoceros Times and the Triad Diner Vegetarian Restaurant of the Year Awards.
My last vegan restaurant review featured the Chicago Diner, a dive that skillfully and deliciously purged all animal products from American food including BLTs, Philly cheesesteak sandwiches, and even milkshakes and cheesecake. Boba House offers some dishes that are similar to the Chicago diner—the staple burger and yam fries and vegan cakes—but serves predominantly Asian cuisine, each entrée served with a different type of vegan “meat.” Some tantalizing examples from the dinner menu include blackened tuna, ginger chicken, and sesame beef. Boba House also offers delectable appetizers including crispy rolls and fried calamari. For dessert, vegan guests can choose from cheesecake, carrot cake, and chocolate cake. “Boba” (bubble) teas are the signature drinks and can be made with either with tapioca pearls or coconut jelly, but a wide variety of black, green, and herbal teas are also offered.
Boba House is open Monday-Friday 11:30AM-3:00PM and 5:00-9:30PM. Saturday hours are 12:00PM-9:00PM; the restaurant is closed Sunday. Prices are extremely reasonable, with dinner entrees ranging $8-$11. The lunch specials, however, as Cody and I discovered, cannot be beat. Boba House offers some of their most popular entrees as lunch portions, including Eternal Bliss, “a harmonious blend of green treasures,” and Black Pepper “Steak,” starting at $5.99. Each entrée comes with your choice of “meat:” tofu, chicken, beef, or shrimp (all vegan). Guests can also add salad or crispy rolls for an additional $1.99.
Cody and I shared the Eternal Bliss with tofu and the Pad Thai with chicken for lunch. Each entrée was beautifully presented on a colorful plate and the portions were generous (we were too full to try any of the vegan desserts). The servers were friendly and outgoing, and Boba House indeed seemed like the neighborhood meeting place, with the crowd including students, faculty, and everyday townies. Not all of the Boba House patrons could have possibly been vegan, which to me was an encouraging sign of vegan cuisine having the power to attract vegans and meat-eaters alike.
Boba House also sells all of their “meat,” including chicken, steak, shrimp, fish fillets, and ribs online, providing an alternative to some of the grocery store meat-replacement brands. To order vegan meat from Boba house, click here.
It was a pleasant surprise to find a vegan restaurant in Greensboro, and our meal at Boba House was the tastiest we had on our road trip. Be sure to check out Boba House’s beautiful website here and pay a visit next time you’re traveling to North Carolina!
Wednesday, February 24, 2010
Vegan Hamentashen
To revisit the Adventures with Sourdough post from two weeks ago, creATE reader Sam S. suggested the following to bake lighter and more flavorful sourdough bread:
Sure enough, the bread was much better, and gone within 24 hours. Thanks, Sam!
The Jewish holiday Purim begins tonight at sundown. I’ve always enjoyed Purim because it’s one of the happiest holidays, celebrating the Jews being saved from extermination by the Persians. Along with reading the story of Purim, dressing up in costume, and engaging in age-appropriate festivities, my favorite aspect of Purim is the tradition of giving money or food to charity and delivering small gifts of food to family and friends. I love this tradition because we are commanded to be happy and community-friendly in one great day.
For Eastern European Jews, it’s custom to eat hamentashen, triangular-shaped cookies filled with fruit, poppy seeds, or chocolate. This cookie is symbolic of the three-cornered hat that the Purim story’s villain, Haman, wore in the story.
 Jewish holidays, as with holidays in many cultures, can be challenging for vegans, and I struggled to find a recipe for vegan hamentashen and an even more difficult time finding a vegan chocolate filling, which is my all-time favorite flavor.
After scanning through several recipes that looked unreliable, I tweaked the most promising version I could find for creATE. Enjoy! (And share with your friends.)
Vegan Hamentashen
2 cups unbleached flour
1 ½ tsp. baking powder
½ cup non-hydrogenated vegetable oil spread (such as Earth Balance)
¾ cup brown sugar
¼ cup soymilk
Your choice of filling. Suggestions include: any flavor fruit preserves or butter (blueberry and cherry are my personal favorites), pie filling, chocolate (see filling recipe below), or vegan cream cheese.
Vegan Chocolate Filling
½ cup cocoa powder
½ cup flour
½ cup soymilk
½ cup brown sugar or other natural sweetener
¼ cup vegetable oil
Mix all ingredients in a small bowl until blended.
Enjoy!
- Work for a moister and more pliable dough
- “Retard” the dough by putting it in the refrigerator for several hours during the second rise
Sure enough, the bread was much better, and gone within 24 hours. Thanks, Sam!
The Jewish holiday Purim begins tonight at sundown. I’ve always enjoyed Purim because it’s one of the happiest holidays, celebrating the Jews being saved from extermination by the Persians. Along with reading the story of Purim, dressing up in costume, and engaging in age-appropriate festivities, my favorite aspect of Purim is the tradition of giving money or food to charity and delivering small gifts of food to family and friends. I love this tradition because we are commanded to be happy and community-friendly in one great day.
For Eastern European Jews, it’s custom to eat hamentashen, triangular-shaped cookies filled with fruit, poppy seeds, or chocolate. This cookie is symbolic of the three-cornered hat that the Purim story’s villain, Haman, wore in the story.

After scanning through several recipes that looked unreliable, I tweaked the most promising version I could find for creATE. Enjoy! (And share with your friends.)
Vegan Hamentashen
2 cups unbleached flour
1 ½ tsp. baking powder
½ cup non-hydrogenated vegetable oil spread (such as Earth Balance)
¾ cup brown sugar
¼ cup soymilk
Your choice of filling. Suggestions include: any flavor fruit preserves or butter (blueberry and cherry are my personal favorites), pie filling, chocolate (see filling recipe below), or vegan cream cheese.
- Mix together the flour and baking powder in a medium bowl and set aside.
- In a large bowl, cream the vegetable oil spread, brown sugar and soymilk. Mix in the dry ingredients. Chill dough for 6 hours or overnight.
- On a floured surface, roll dough ¼ inch thick. Use a 3-inch cookie cutter or drinking glass to cut circles in the dough. Place a small amount of filling in the center of each circle. Pinch three corners of the dough to form a triangular-shaped cookie with a small hole in the center.
- Bake on a lightly oiled cookie sheet at 375 degrees for 10-12 minutes or until golden brown. Cool on wire racks.
Vegan Chocolate Filling
½ cup cocoa powder
½ cup flour
½ cup soymilk
½ cup brown sugar or other natural sweetener
¼ cup vegetable oil
Mix all ingredients in a small bowl until blended.
Enjoy!
Wednesday, February 17, 2010
Mac and Cheese: Vegan style

During my most recent cheese craving, I visited The Earthen Jar, a favorite vegetarian spot in Ann Arbor, hoping for a plate of their vegan macaroni and cheese. For creATE readers who aren’t familiar with Ann Arbor’s Earthen Jar, it’s a fantastic hole-in-the-wall mostly vegan establishment that serves buffet-style Indian cuisine. Not only can visitors to the Earthen Jar sample dozens of delicious Indian entrees, but Earthen Jar always has sautéed and scrambled tofu, vegan cookies, and, most importantly, vegan macaroni and “cheese.” My only problem was that the last time I went to Earthen Jar they were out of mac and cheese.
I’ve been craving vegan macaroni and cheese ever sine that trip, and, now that I have a real food processor, I finally felt like I’d be able to cook up—and blend—a decent vegan cheese sauce. The recipe I used was a combination of the vegan macaroni and cheese recipes from my favorite vegan cookbook, Vegan Planet by Robin Robertson, and a recipe my friend Gabe makes at his co-op. This recipe called for nutritional yeast, a deactivated form of yeast, is very different from active yeast, which is used in baking.
As discussed in my last creATE post, Adventures With Sourdough, active dry yeast, the type of yeast most commonly used for baking breads, is nearly devoid of all nutrients. While active dry yeast can make your bread rise, if you eat it raw, it will live in your intestinal track and suck nutrients out of your body. Nutritional yeast, in contrast, is pasteurized and dried so the actual living yeast is killed, and what remains is a vegan superfood (when consumed in moderate quantities). Below are the nutrition facts for 2 heaping tablespoons of Red Star nutritional yeast flakes:
Calories: 60
Total fat: 1 g
Cholesterol: 0 mg
Sodium: 5 mg
Total Carbohydrate: 7 g
Fiber: 4 g
Protein: 8 g
Vitamins and minerals (as percentages of Daily Value recommendations):
Thiamin (B1): 640%
Riboflavin (B2): 565%
Niacin: 280%
Vitamin B6: 480%
Folic Acid: 60%
Vitamin B12: 133%
Nutritional yeast also contains chromium and selenium, trace minerals important in regulating blood sugar levels.
Besides providing an excellent source of nutrients that vegans often have trouble obtaining from plant foods, nutritional yeast also tastes cheesy. It can be used as a flavorful topping to popcorn, pastas, burgers, or pizzas, or can be baked into casseroles where cheese might be lacking.
Here’s the recipe I ended up using for my vegan macaroni and cheese:

1 tbsp olive oil
1 large yellow onion, chopped
4 cloves garlic, minced
2 cups soymilk
1 12-oz. package soft silken tofu, drained
1 tbsp. fresh lemon juice
1 cup nutritional yeast flakes
1 tbsp. spicy mustard
2 tbsp. Italian seasoning blend (includes basil, oregano, rosemary, and thyme)
salt and pepper
1 cup bread crumbs (homemade is best!)
- Preheat the oven to 375 degrees. Cook elbow macaroni according to package instructions. Drain, rinse, and set aside in a large bowl.
- In a medium frying pan, sauteé onions and garlic until onions are tender.
- In a food processor, combine onions and garlic, soymilk, tofu, lemon juice, nutritional yeast flakes, spicy mustard, and seasonings. Blend until smooth. Pour mixture over macaroni noodles and stir to mix evenly. Spread noodles and sauce evenly into a lightly oiled 9x13-inch baking pan. Top with breadcrumbs.
- Bake covered for about 25 minutes, or until hot and bubbly. Uncover and bake 10 more minutes for crispy, golden brown breadcrumbs. Enjoy!
Bulk Foods
Sundance Foods
Best Natural Foods
The Cook’s Thesaurus
Friday, February 12, 2010
Adventures with Sourdough

Since I started creATE, my friend Lisa, has been raving to me about her sourdough starter and the great bread—not to mention pizza dough and onion rings—she makes every week. Lisa is a longtime friend who cooks nearly everything from scratch. So when she offered me a portion of her sourdough starter so that I could make my own bread, I was eager to travel to her side of town to acquire it (and write a blog entry about it).
I finally visited Lisa a couple weeks ago to pick up the starter and see how she makes fantastic bread using the no-knead method. Lisa made her starter almost one year ago using fermented grapes. She “feeds” the sourdough starter twice weekly with equal parts flour (wheat or white) and distilled water and stores the active cultures in an air-tight jar in the refrigerator. I was curious to know what exactly makes the sourdough starter so special, so I’ve been poking around on the Internet this week looking for reliable information. Finally, I found a great article on HowStuffWorks.com, the website for a podcast I love to listen to when I feel like learning random facts of life.
According to HowStuffWorks.com, making sourdough requires grain, water, and a source of yeast. The yeast is the fungus that is able to break down the starches in wheat four via fermentation to form sugar, making the bread rise. The big difference between commercial yeast fungi and sourdough yeast fungi is that sourdough is alive! While commercial yeast is dried, preserved, and made into a powder, the sourdough fungi need to be kept alive and active in a liquid medium called a starter. These active cultures are what give sourdough bread its distinctive flavor.
Perhaps the fact that sourdough leaving is constantly alive, waiting to be used for bread, whereas conventional bread yeast needs to be “activated,” is what makes sourdough so intriguing. The art of making sourdough is ancient, and sourdough bread is actually much more nutritious than breads made with dried yeast. Here’s some insight on natural leaving methods from Jacques DeLangre, Ph.D. (excerpt from Sally Fallon’s Nourishing Traditions):
"In books on baking and even in nutritional/medical writings, the two techniques [for making bread], natural leaven (sourdough) and baker’s yeast, are often mingled and confounded…. Baking with natural leaven is in harmony with nature and maintains the integrity and nutrition of the cereal grains used…. The process helps to increase and reinforce our body’s absorption of the cereal’s nutrients. Unlike yeasted bread that diminishes, even destroys, much of the grain’s nutritional value, naturally leavened bread does not stale and, as it ages, maintains its original moisture much longer."
DeLangre goes on to say that yeast was introduced into Louis XIV’s court in 1668, it was strongly rejected because of perceived health risks. Today, scientific evidence is proving these fears valid, that commercial yeast actually destroys many of the nutrients bread can offer.
After I learned about how the starter works, I began to wonder why the sourdough doesn’t start growing lots of other types of bacteria and mold. Of course, HowStuffWorks had the answer. The starch in the bread flour, unlike sugar, is not something in which many types of bacteria can live. Conveniently, yeast contains special enzymes that allow it to cohabitate with the starch. The lactobacilli—the type of bacteria found in the starter—along with the yeast, also produce alcohol and lactic acid that keep other bacteria from growing. Way to go Mother Nature.
After I expanded the starter enough by adding equal parts whole-wheat flour and distilled water two or three times per week, I was ready to make my bread. It took some coordinating with my work schedule since the no-knead bread needs to proof for 18 hours, followed by a second 1 ½-hour proofing phase, and then bake for nearly one hour.
Lisa recommended the no-knead sourdough bread method from Breadtopia, a fantastic resource for making bread. Breadtopia not only has recipes, discussions, and bread-making products for sale, but videos that demonstrate the bread-making methods, which can sometimes be hard to describe with words.
On Monday afternoon, I mixed together in a large bowl:
1 cup white flour
2 ½ cups whole wheat flour
1 ½ tsp salt
In a smaller bowl, I mixed:
1 ½ cups distilled water
¼ cup (heaping) sourdough starter
I then mixed the liquid mixture into the flour mixture and stirred until dough formed. I covered the large bowl with plastic wrap and allowed the bread to “proof” for 18 hours in the oven (heat off).

The next morning, the dough was nearly three times larger than it had been the day before. I removed the dough from the bowl and placed it on a floured counter top. I spread the dough out, folded it in thirds, and then in half on it self. I then let the dough sit, covered with the plastic wrap, on the counter for fifteen minutes before placing it back in a greased and floured bowl to rise, covered again, for another 1 ½ hours.
About one hour into the rising time, I preheated the oven to 450 degrees and placed a baking pan filled with water on the lowermost oven rack. Creating steam in the oven allows for the sourdough to bake in a humid environment, which ultimately allows for the crusty crust characteristic of traditional sourdough bread. When the dough was finished with its second rising period, I placed the dough on to a greased cookie sheet and baked the bread in the humid oven at 450 degrees for 20 minutes. After the 20 minutes, I removed the water pan, lowered the heat to 375 degrees and baked for another 40 minutes.

The bread smelled and looked delicious, although it was very dense and doughy. I’ll be working in the next couple of weeks improve the bread recipe and technique and share this with all of you. If you're interested in making bread, be sure to check out Breadtopia for fantastic recipes, discussions, and video demonstrations. Obviously, if anyone has any sourdough tips they’d like to share with the creATE community, we’d all love to hear them!
Subscribe to:
Comments (Atom)